Eggies Cooking Time Chart – Food preparation is both an art and a science, and recognizing the best cooking times can make all the difference in between a scrumptious meal and a culinary catastrophe. Whether you’re a skilled cook or a home cook, having a trustworthy cooking time graph at your disposal is essential. In this write-up, we’ll dive deep right into the world of cooking times, breaking down everything you require to know to guarantee your meals end up completely each time. Eggies Cooking Time Chart.
Importance of Understanding Cooking Times
Food preparation times are essential for making certain that your food is cooked completely and safely. Appropriate cooking not just improves the flavor and appearance of your recipes but likewise assists protect against foodborne health problems. Overcooking or undercooking can substantially impact the high quality of your dish, making understanding food preparation times a crucial ability in the kitchen area.
Exactly How Food Preparation Times Affect Food Quality
Cooking times can influence more than simply safety; they also influence taste and appearance. As an example, overcooked meat can become challenging and completely dry, while undercooked fowl can be hazardous to eat. A cooking time graph helps you strike the ideal balance, guaranteeing your recipes are both safe and delicious.

Recognizing Cooking Times
What are Food preparation Times?
Cooking times refer to the period required to prepare food to the preferred doneness degree. These times can differ based upon the kind of food, its dimension, and the food preparation technique used. A well-structured cooking time graph gives a fast reference for these times, making meal prep more efficient.
Elements Impacting Food Preparation Times
Numerous factors can influence cooking times, consisting of:
- Size and Density: Larger or thicker items of food generally need even more time to prepare.
- Food Preparation Method: Various techniques (e.g., cooking, grilling) can affect just how swiftly food cooks.
- Temperature: Food preparation at higher or lower temperatures will alter cooking times.
- Altitude: Cooking times can be much longer at greater elevations due to reduced air pressure.
Cooking Time Chart Basics
Kinds Of Food Preparation Time Charts
Cooking time graphes can be classified into numerous kinds:
- General Charts: Provide typical cooking times for different foods.
- Specialized Charts: Focus on specific groups like meats or veggies.
- Method-Specific Charts: Detail times based upon cooking techniques like baking or grilling.
Exactly how to Utilize a Food Preparation Time Chart
Making use of a cooking time chart is simple. Find the type of food and its preparation approach, after that describe the advised time. Change based on your certain conditions, such as stove type or food size.

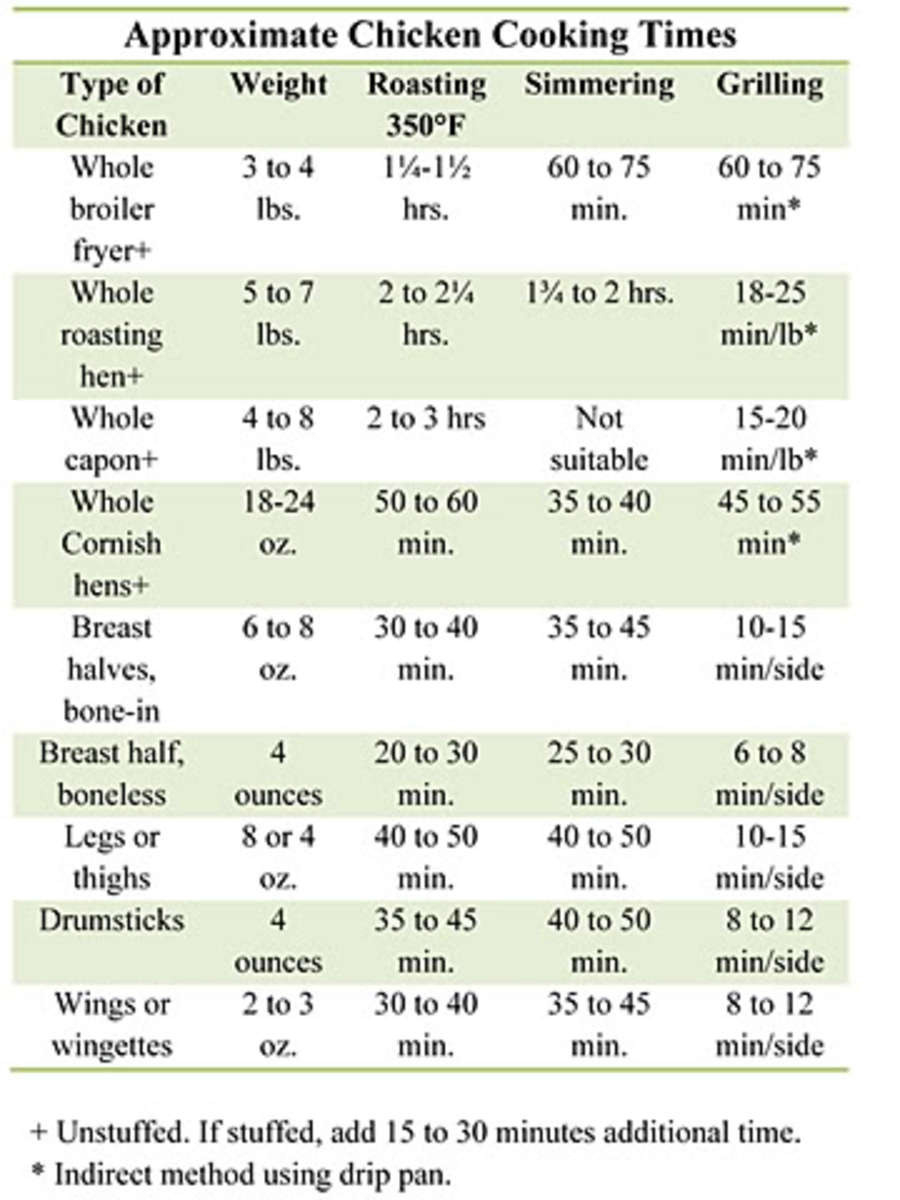
Meat Cooking Times
Beef
- Roasts: For a medium-rare roast, cook at 325 ° F( 163 ° C) for around 20 mins per extra pound.
- Steaks: Grill or pan-fry for about 4-5 mins per side for medium-rare.
Pork
- Roasts: Prepare at 325 ° F( 163 ° C) for 25 minutes per pound.
- Chops: Grill or pan-fry for 6-8 minutes per side, depending upon thickness.
Chicken
- Entire Poultry: Roast at 350 ° F( 177 ° C )for about 20 minutes per pound.
- Chicken Breasts: Cook at 375 ° F( 190 ° C) for 25-30 mins.
Lamb
- Roasts: Cook at 325 ° F( 163 ° C )for around 25 mins per pound for medium-rare.
- Chops: Grill or pan-fry for 4-5 mins per side.
Fish And Shellfish Cooking Times
Fish
- Whole Fish: Cook at 400 ° F( 204 ° C) for 20 mins per
- pound. Fillets: Cook at 375 ° F( 190 ° C )for 15-20 mins.
Shellfish
- Shrimp: Boil or sauté for 3-4 mins until pink and opaque.
- Lobster: Boil for about 7-10 minutes per pound.
Vegetable Cooking Times
OriginVegetables
- Potatoes: Cook at 400 ° F( 204 ° C )for 45-60 mins, depending on dimension.
- Carrots: Boil for 5-7 mins or roast for 25-30 minutes.
Leafy Greens
- Spinach: Sauté for 2-3 minutes until shrivelled.
- Kale: Sauté or cook for 10-15 mins.
Cruciferous Veggies
- Broccoli: Vapor for 5-7 mins.
- Cauliflower: Roast at 425 ° F( 218 ° C )for 20-25 mins.
Food Preparation Times for Different Approaches
- Cooking: Cooking times vary based on the recipe. Cakes, casseroles, and bread each have one-of-a-kind times and temperature levels.
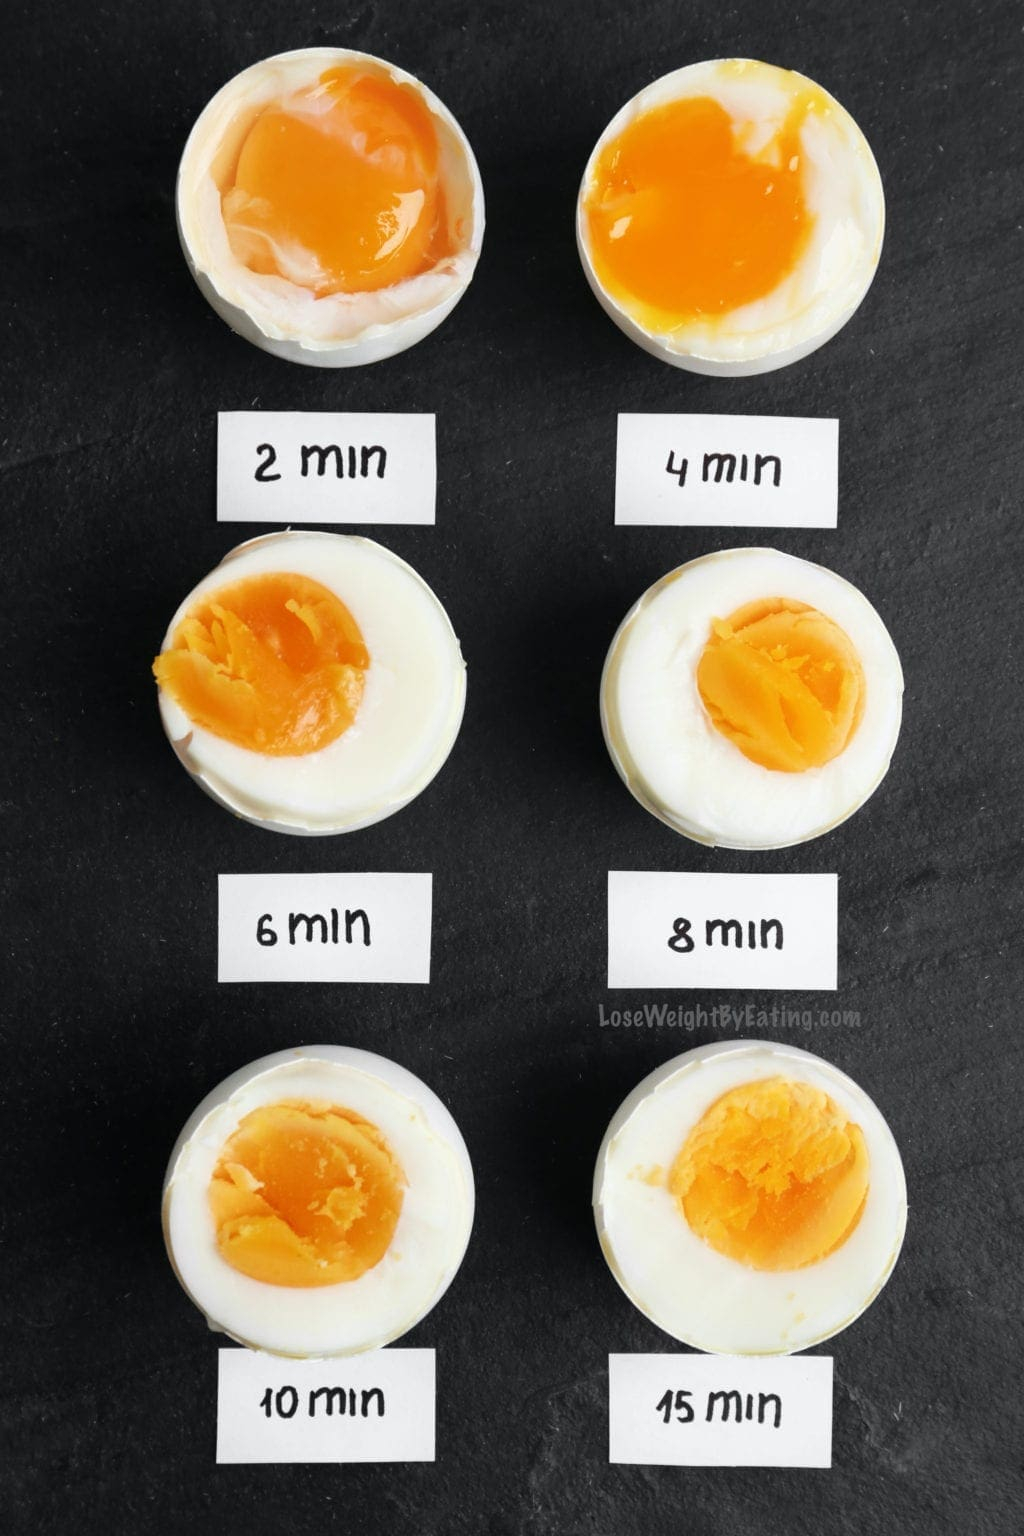
- Boiling: Boiling times depend upon the food. For pasta, it’s generally 8-12 minutes; for eggs, regarding 10 mins for hard-boiled.
- Steaming: Steaming preserves nutrients much better. Vegetables usually take 5-10 minutes, depending on size.
- Sautéing: Sautéing is quick, commonly taking 5-10 minutes for vegetables and 3-4 minutes for proteins.
- Barbecuing: Grilling times differ commonly. For meats, it can range from 4 mins per side for thin cuts to 20 minutes per side for thicker items.
Special Factors to consider
Altitude and Cooking Times
1. Understanding Altitude Impacts
At greater elevations, the reduced atmospheric pressure can influence cooking times and temperatures. For example, water boils at a lower temperature, which suggests that food preparation procedures may need more time to finish. Readjusting your recipes for elevation can guarantee better outcomes.
2. Changing Cooking Times
- As much as 3,000 Feet: Slight modifications are normally adequate. Rise food preparation time by regarding 5-10% or include a few added minutes.
- 3,000 to 6,000 Feet: Moderate adjustments might be needed. Boost cooking time by 10-20%, and occasionally increase the temperature level by 25 ° F to guarantee appropriate cooking.
- Over 6,000 Feet: Substantial changes are required. Rise cooking time by 20-30% and readjust temperature setups as required. For cooking, you could also require to readjust the amount of fluid and leavening agents.
3. Cooking at High Altitudes
Cooking can be particularly tricky. For cakes and cookies:
- Minimize Cooking Powder/Soda: Too much can create rapid climbing and collapse.
- Rise Flour: To compensate for the reduced density of air.
- Rise Fluid: To counteract the faster dissipation rates.
Stove Variations
1. Oven Temperature Precision
Not all ovens heat consistently. A basic stove may have temperature level variations of up to 50 ° F. This disparity can impact food preparation and cooking end results.
2. Examining Stove Temperature
To guarantee your oven is at the right temperature:
- Utilize an Oven Thermostat: Position it in the center of the stove and compare the reading to your stove’s temperature level setup.
- Normal Calibration: Calibrate your stove occasionally to keep accuracy.
3. Checking Food Preparation Times
- Examine Early: Start inspecting your food a couple of minutes before the advised cooking time to prevent overcooking.
- Changing Dishes: If you find your oven chefs much faster or slower, adjust your recipes accordingly by either reducing or increasing cooking times.
4. Convection Ovens
Stove flow air, which can cause much faster and a lot more also cooking. Typically, minimize cooking time by regarding 25% or lower the temperature by 25 ° F contrasted to standard stoves.

Tips for Accurate Food Preparation Times
Making Use Of a Meat Thermometer
1. Value of a Meat Thermometer
A meat thermometer is an necessary tool for making sure that meats reach the appropriate inner temperature level. This prevents undercooking and overcooking, guaranteeing food safety and security and preferred doneness.
2. Kinds Of Meat Thermometers
- Dial Thermostats: Include a metal probe with a dial for checking out temperatures. Insert the probe right into the thickest part of the meat.
- Digital Thermometers: Supply fast and precise readings with a digital screen. Suitable for specific temperature level measurement.
- Instant-Read Thermometers: Offer rapid results, usually within a couple of seconds. Perfect for inspecting temperature throughout food preparation.
3. Just how to Use a Meat Thermometer
- Place Appropriately: Insert the thermostat right into the thickest part of the meat, preventing bones and fat.
- Inspect Temperature Level: Guarantee the meat gets to the recommended internal temperature level for security and top quality.
- Tidy After Usage: Clean the probe with hot, soapy water prior to and after usage to prevent cross-contamination.
4. Advised Interior Temperatures
- Poultry: 165 ° F( 74 ° C).
- Beef, Pork, Lamb: 145 ° F( 63 ° C).
- Ground Meats: 160 ° F (71 ° C).
- Fish: 145 ° F (63 ° C).
Checking Doneness.
1. Visual Hints
- Meat Shade: For lots of meats, a adjustment in shade indicates doneness. As an example, chicken needs to no more be pink, and beef should have a clear, reddish-pink shade for medium-rare.
- Juices: Clear juices generally signify that meat is prepared through, while pink or red juices may indicate that extra cooking is required.
2. Tactile Signs.
- Structure: Suppleness can be a excellent sign of doneness. For instance, a well-done steak will certainly really feel solid, whereas a unusual steak will certainly really feel soft.
- Touch Test: Contrast the suppleness of the meat to the suppleness of the hand of your hand for a harsh scale of doneness.
3. Cooking Times and Doneness.
- Comply With Recipes: Recipes offer cooking times based on specific temperature levels and meat cuts. Adjust these times based upon your details oven or altitude.
- Relaxing Time: Allow meats to relax after food preparation. This helps redistribute juices and can influence last texture and temperature level. Relaxing times can differ however usually array from 5 to 15 minutes relying on the size and sort of meat.
4. Stove Monitoring.
- Utilize a Timer: Establish a timer based on the advised food preparation time. Check your food regularly as stoves differ.
- Adjust as Needed: If using a stove or food preparation at high elevations, keep in mind to readjust the cooking time and temperature as required.
Common Mistakes and Just How to Avoid Them.
- Overcooking: To avoid overcooking, monitor your food very closely and make use of timers. Remember that some foods remain to prepare after being removed from warmth.
- Undercooking: Undercooking can be stayed clear of by following recommended times and inspecting doneness with a thermostat or other techniques.
Adjusting Food Preparation Times for Recipes.
- Modifying Times for Different Sizes: Change cooking times based upon the size of your food. Bigger pieces take much longer, while smaller sized items cook faster.
- Adjusting for Personal Preferences: Personal preference can influence cooking times. For example, if you favor well-done meat, prepare a bit longer than the standard time.
Verdict.
Understanding how to use a cooking time chart is a useful skill in the cooking area. It helps ensure that your dishes are prepared to excellence, stabilizing safety and security with taste and appearance. By understanding the basics of cooking times and how they vary by food type and technique, you can improve your cooking efficiency and avoid typical errors. Remember, cooking is as much about experience as it has to do with guidelines, so make use of these charts as a starting point and readjust as required to fit your choices and kitchen problems.
Frequently Asked Questions.
- How do I change cooking times for frozen foods?
- Frozen foods typically require additional cooking time. Inspect the plan directions for certain recommendations.
- What’s the most effective method to make sure even cooking?
- Ensure also cooking by utilizing uniform sizes for your food and transforming or stirring it as required.
- Can I use the same cooking time graph for all ovens?
- While charts supply general guidelines, specific stove performance can vary. Use an stove thermostat for finest results.
- Exactly how do I transform cooking times for different cooking techniques?
- Different techniques can influence cooking times. As an example, cooking may call for even more time than steaming. Usage particular charts for every method or adjust based on experience.
- What should I do if I do not have a cooking time graph?
- In the absence of a graph, describe dish standards, and adjust based on the size and kind of food. Make use of a thermostat to ensure correct doneness.